MyBatis项目环境搭建及第一个MyBatis程序
请参考:http://www.leonwish.com/archives/59
搭建Spring开发环境
请参考:http://www.leonwish.com/archives/79
第一个Spring程序的撰写,理解SpringIOC
请参考:http://www.leonwish.com/archives/81
第二个Spring程序的撰写,理解SpringAOP
请参考:http://www.leonwish.com/archives/86
第三个Spring程序的撰写,整合Spring和MyBatis
第一步:添加依赖。
    <dependency>
        <groupId>org.mybatis</groupId>
        <artifactId>mybatis</artifactId>
        <version>3.5.3</version>
    </dependency>
    <dependency>
        <groupId>mysql</groupId>
        <artifactId>mysql-connector-java</artifactId>
        <version>5.1.6</version>
    </dependency>
    <dependency>
        <groupId>org.springframework</groupId>
        <artifactId>spring-context</artifactId>
        <version>5.2.2.RELEASE</version>
    </dependency>
    <dependency>
        <groupId>org.springframework</groupId>
        <artifactId>spring-jdbc</artifactId>
        <version>5.2.2.RELEASE</version>
    </dependency>
    <dependency>
        <groupId>org.mybatis</groupId>
        <artifactId>mybatis-spring</artifactId>
        <version>2.0.3</version>
    </dependency>
    <dependency>
        <groupId>com.alibaba</groupId>
        <artifactId>druid</artifactId>
        <version>1.1.21</version>
    </dependency>
第二步:建表、定义对应的实体类
数据库名:java_all,表名:t_person,表结构如下:

在entity包下新建实体类Person
package com.royotech.entity;

import java.io.Serializable;

public class Person implements Serializable{
    private Integer id;
    private String name;
    private String birthday;
    private String telephone;
    private String address;

    public Person() {
        super();
    }

    public Integer getId() {
        return id;
    }

    public void setId(Integer id) {
        this.id = id;
    }

    public String getName() {
        return name;
    }

    public void setName(String name) {
        this.name = name;
    }

    public String getBirthday() {
        return birthday;
    }

    public void setBirthday(String birthday) {
        this.birthday = birthday;
    }

    public String getTelephone() {
        return telephone;
    }

    public void setTelephone(String telephone) {
        this.telephone = telephone;
    }

    public String getAddress() {
        return address;
    }

    public void setAddress(String address) {
        this.address = address;
    }

    @Override
    public String toString() {
        return "Person [id=" + id + ", name=" + name + ", birthday=" + birthday + ", telephone=" + telephone
                + ", address=" + address + "]";
    }
}
第三步:DAO包下定义DAO接口
package com.royotech.dao;

import java.util.List;

import com.royotech.entity.Person;

public interface PersonDAO {
    public List<Person> selectAll();
}
第四步:applicationContext.xml下增加对应的bean标签
    <!-- 1.创建数据源(之前在mybatis-config.xml中配置) -->
    <bean id="ds" class="com.alibaba.druid.pool.DruidDataSource">
        <property name="url" value="jdbc:mysql://localhost:3306/java_all?useUnicode=true&characterEncoding=utf8"></property>
        <property name="driverClassName" value="com.mysql.jdbc.Driver"></property>
        <property name="username" value="root"></property>
        <property name="password" value="123123"></property>
    </bean>
    <!-- 2.创建SqlSessionFactory对象 -->
    <bean id="sqlSessionFactory" class="org.mybatis.spring.SqlSessionFactoryBean">
        <property name="dataSource" ref="ds"></property>
        <!-- 相当于mybaits-config.xml中的mapper注册,可以使用通配符* -->
        <property name="mapperLocations" value="classpath:mappers/*Mapper.xml"></property>
        <property name="typeAliasesPackage" value="com.royotech.entity"></property>
    </bean>
    <!-- 3.创建DAO对象 -->
    <bean class="org.mybatis.spring.mapper.MapperScannerConfigurer">
        <!-- 提供DAO接口包名,自动创建该包下所有DAO接口的实现类对象 -->
        <!-- DAO类名的首字母小写,就是从工厂中获取该接口对应实现类对象的id -->
        <property name="basePackage" value="com.royotech.dao"></property>
    </bean>
第五步:在view包下建立SelectPersonSpringMyBatis对象
package com.royotech.view;
import java.util.List;
import org.springframework.context.support.ClassPathXmlApplicationContext;
import com.royotech.dao.PersonDAO;
import com.royotech.entity.Person;
public class SelectPersonSpringMyBatis {
public static void main(String[] args) throws Exception{
ClassPathXmlApplicationContext ac = new ClassPathXmlApplicationContext("applicationContext.xml");
PersonDAO personDAO = (PersonDAO)ac.getBean("personDAO");
List<Person> listPerson = personDAO.selectAll();
for(Person person : listPerson) {
System.out.println(person);
}
}
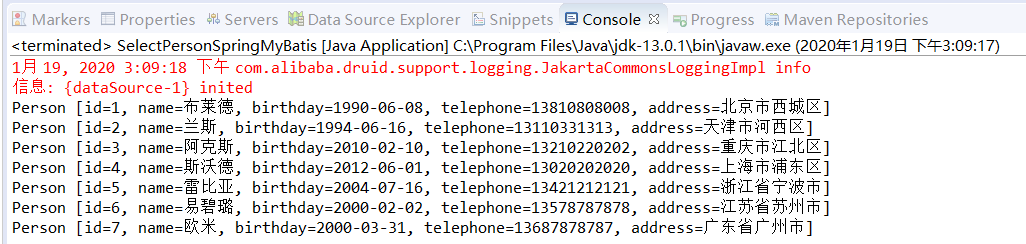
}运行一下,大功告成:
程序使用Spring和MyBatis前后的对比
- MyBatis用于替换DAO.impl包下的实现类,也就是DAO实现类。替代方法是使用mybatis-config.xml和mapper.xml文件。
- Spring和MyBatis整合后,mybatis-config.xml文件也省略了,其中对应的内容被写进了Spring配置文件applicationContext.xml文件中。
[…] 请参考:http://www.leonwish.com/archives/88 […]